Category Archives: Scale Model Projects

Tent Models as Sales Tool

Recently KiwiMill was asked to make a series of tent models to depict a manufacturer’s product line. The models would be used as a sales and marketing tool, with possible trade show use as well.

Masters were formed on the CNC mill out of tooling board to represent three different tent designs. The tents all have metal frames with wire cross pieces and the idea was to show some of this detail on the model surfaces.

The tents were then vacuum formed using the 3 carved masters. Twenty of one design were made, and 10 each of the two other designs.

Tent connectors were made from stamped sheet metal. Five different styles were built. These connectors would attach to the tents by the placement of magnets in each tent. The idea was to offer the ability to reconfigure the tents and connectors into different layouts as needed.

Vinyl graphics were digitally printed and the tents and connectors were painted olive drab.

An oak trimmed  48″ by 60″ base was constructed with sheet metal underneath a grass mat. This way the magnetized tents would stay in place when configured, rather than slipping around.

The finished diorama can be added to, subtracted from and reconfigured using different tents and connectors.

Ask The Model Maker!

Model Maker

Ask the model maker: What burning question do you have about model making? What is something you want to know about model makers, model making, or scale models? It can be a technical question, a price inquiry, a personal question or a how-to . Anything goes.

Leave your question in the comments section and it will be answered by a model maker (through me) by the end of the week.

Remote Control Trade Show Truck Model


Truck Model

Occasionally professional model making feels a little bit like a kid in a candy shop. This phenomena occurred recently when KiwiMill was asked to build a trade show truck model of a car carrier in 1:14 scale (big!)

When it was determined that the semi trailer truck model would be outfitted with an RC controller, lights and sound, it became one of those projects that reminds model makers of why they went into the business in the first place.

Our team started with a cab kit. It was surprisingly challenging to build, considering most of our work is custom, made-from-scratch. All of the chrome parts were swapped out for more authentic looking, hand-built parts. The only way to make chrome look realistic at this scale is to actually make it out of metal – otherwise it just looks cheap. These custom aluminum add ons were more accurate and detailed.

Model Maker

Even though lighting was supplied in the RC kit, additional bulbs were added throughout the model. These decorative lights can be found on real 18 wheelers, which are really like a person’s temporary home on wheels.

Model Maker

The trailer was scratch built from laser cut styrene. Vinyl graphics were added to the trailer which included both the company’s signage and details found on the sides of trucks such as seams, rivets, handles, etc…

Model Maker

The wheels were molded and cast in the shop. The resulting combination of kit and hand-built parts made for an impressive finished truck model that was both a delight to display and interact with, as well as being an economical choice for a relatively large-scale vehicle.

Truck ModelTruck Model

KiwiMill Helicopter Model Build


A year ago, KiwiMill documented a 1/10 scale multiple helicopter model build, to be used as a reference in future, similar projects.

It began with brainstorming sessions to determine the materials and methods used in the process. Various approaches were suggested for going about the construction. Ultimately a design was settled upon using the same criteria as our other projects: consideration was given to the purpose of the helicopters (multiple trade show use), the scale, the amount of desired detail and a very challenging time frame of 8 weeks.

Once the over all fabrication methods were decided upon, our project manager, Dean, created a spread sheet time-line of our mission. This master schedule would be referred to throughout the project in order to maximize the time spent on each process, and to check that progress was staying on target for the due date.

model maker spread sheet

Drawings were made in Autodesk Inventor for the parts that were scheduled for machining. The helicopter bodies were CNC milled in-house, starting with foam blocks. Each shape was roughly carved on the CNC router and then coated in resin and re-machined for a finer finish.

The helicopter blades were CNC machined as well. A master was created out of ren board, then molded and cast into multiples and painted.

More detailed appendages were created with our 3D printer. These included the blade hubs, rear props, camera turrets and missiles:

The helicopter model parts were then assembled using a variety of techniques. Because the helicopters needed mounting points for display, a sheet metal skeleton was designed for each body to form around. This gave our model makers  a secure place to attach aluminum block mounts with brass sleeves, using bolts. Other parts were assembled using resin and solvent.


A special fastening method was used for the helicopters involving magnets. Magnets allowed for parts to be assembled and disassembled with ease by the client, and were used in the rotor blades, props & mounts.

In the final days of the project the helicopters were painted. The process required a look back at the original files that were provided in order to determine the exact location of the windows. Measurements were taken off the drawings to be used as reference points, but the final placement was done by eye. The helicopters were masked off and brought into the spray booth for application.

The last, yet very important, consideration that went into this project was the design of each case that would house and transport the helicopter models to various trade shows.  These road cases were custom created to fit each helicopter model  and its particular appendages. Padded jigging was built for the bodies to nestle into, along with designated locations for each removable part.

model maker

A couple of the finished products:

helicopter model

helicopter model

House Model Prop for “How It’s Made” Television Program

KiwiMill just built a house model for Cavco to be used as a television prop for How It’s Made, on the Discovery Channel (Canada) and  Science Channel (USA).

This scale house model was created in less than a week and shipped to Canada in time for a taping of the show.  After the model is used in the TV episode it will serve as a sales model back at the home offices.

Museum Model Gives Local History Lesson

It’s not often that KiwiMill has the opportunity to work on a local scale model project. This past summer we jumped at the opportunity to contribute a historical museum model to Rochester, NY’s own Genesee Brewery Company. Owned by North American Breweries, this landmark location started in 1878, making it one of the largest and oldest continually operating breweries in the United States.

As part of its evolution, the brewery recently opened the Genesee Brew House in a former packaging facility on its campus, complete with pub-style restaurant, interactive historical exhibits, gift shop and pilot brewery. Housed in this exciting new venture is a 20 foot square historical museum model of the two original breweries and surrounding neighborhoods circa 1915. Commissioned by our client, North American Breweries, its purpose is to provide a permanent record of the area for the community.

As with any historic model, a great deal of research was done by our shop prior to the construction phase. Sanborn and plat maps were used to discern the overall footprint of the model. Model makers walked the site as it stands today, and took photographs of existing structures and remnants.

Genesee Brew House Model ResearchGenesee Brew House Model Research

Old photographs provided by the brewery and the city library became the primary source of research material. These historic photographs helped determine the layout of the streets and buildings, styles and location of surrounding houses, as well as street lamp design and landscaping in the early 1900’s. Architectural drawings of the buildings and houses were then created in AutoCad. After this time-consuming phase, the actual build could begin.

Museum Model Museum Model

Museum Model

Museum Model

Museum ModelMuseum Model


The buildings and houses were scratch built primarily from laser-cut acrylic. Cars and wagons were drawn on the computer and 3D printed. A trestle and tracks were assembled from laser-cut plywood. Railroad cars were scratch built, along with accessories such as street signs, lamp posts, stairs and lawn decor.

Museum ModelMuseum Model

The landscaping included the river gorge created from sculpted foam and mounted on a plywood box bases. The water was made of plexiglass and a layer of liquid model water poured over it. Model trees were placed throughout the site. Dirt was collected locally and sifted and glued down onto the model, giving it a realistic, textured ground cover. Finally, weathering techniques were applied to various parts of the model to tie together the different elements: buildings, streets, landscaping, and accessories.

Museum ModelMuseum Model

All of this attention to detail produced a museum model that accurately portrays a time and place in history – the aim of  well executed dioramas. If done exceptionally well, a historic model will evoke emotions from the viewer as well. If given the opportunity, check out this project in person, and let us know if we met our goal to produce a lasting, meaningful, entertaining and educational display.

Museum ModelMuseum Model

Museum Model

Museum ModelMuseum Model

Museum ModelMuseum Model

Museum Model

Weathering a Scale Model

Architectural Model

Recently I watched our model makers take perfectly crafted scale model buildings and purposely mess them up. My curiosity was piqued. Why painstakingly create a line drawing on the computer, laser cut it, precisely assemble and finish the parts into an architectural model, only to “dirty’ up its perfection?

It turns out that a certain segment of architectural models – historical models – are given what is called weathering effects. Why? The intent is to represent the impact of the elements on an object, in order to project the sense of time, and place, that a historical scale model must provide.

The artistic application of weathering techniques attempts to simulate – not duplicate – the natural ageing and wear process on the buildings, vehicles, roads, and other inanimate objects represented on a particular historical model. Things like dirt, grime, sun fading, paint wear, spills, stains and rusting, must all be scaled down to size using well honed modeling techniques.

In addition to developing specific methods for applying weathering effects, a model maker must do the historic research necessary to match the ageing process with the time period the model is attempting to capture. For instance, a train run on burning wood will leave markings that differ quite significantly from a coal powered machine.

Model makers can enhance their expertise at weathering models by studying the world around them – noting the textures, colors and formations of real life wear and tear . Once you pay attention you may notice that everything is subject to weathering – grass isn’t green, asphalt isn’t black, houses are different shades depending on sun exposure and vehicles have signs of use soon after they are purchased.

Our perception of the world is that it is much more brightly colored and distinct than it actually is in reality. Weathering techniques take a fully painted and detailed model and use filters, washes, dusting, and  other techniques to give the desired muted effect that more closely mimics real life. Signs of wear  like scratches, faded paint, rust and stains further enhance the effect.

It’s a fascinating process watching a model maker take a flawlessly constructed architectural model and add blemishes to it. In a historical scale model, it is this artistic application of ageing techniques that ties the display together and gives it life, and the feeling that it’s accurately captured a moment in time.

A Different Approach to the Same Truck Model

Nearly two years ago, KiwiMill built a model of a five ton FMTV armored cab truck model with a specialized medical hospital payload. The model was 1/10th scale with the truck about 36″ long. It was completely hand-built for trade show use, with a brass frame and numerous brass details. The cab had separately applied bolt head and hinge details on laser etched acrylic armor panels.

military truck scale modelmilitary truck scale modelmilitary truck scale model

Recently the model shop was asked to make a second FMTV truck, in 1/20th scale. Having acquired a 3D printer during the interim, KiwiMill approached the build somewhat differently the second time around. Many detailed parts that were built by hand originally, were drawn on the computer and made with the Objet 3D printer, precisely and quickly. Soldered brass was still used for strength and longevity. The fabric tent design was altered a bit as well.

military truck scale modelmilitary truck scale modelmilitary truck scale model

There is no one right way to make a scale model. Approaches vary depending on the materials and fabrication methods available, as well as the particular preferences of the model maker. Specific client requests may factor in, and of course, budget and time constraints. Skilled model makers adapt and adjust to new technology, continuously honing and  improving on their techniques.

Something that doesn’t change in the profession: the purpose of the scale model will always drive the fabrication method and materials used, while the quality of the finished product will determine if the chosen methods were successful.

Architectural Site Models

Site models serve a variety of purposes. They may be used for sales, fundraising, development approval, corporate show piece, or museum display. Typically they encompass a large geographic area. The area included in a site model often extends beyond the boundaries of the particular structures being featured. In this way it gives the project a sense of place and space.

Because a site model usually needs to cover a lot of area, the scale tends to be smaller. Smaller scale models generally have less detail than a large-scale architectural model. It’s not impossible to create tiny details on a smaller scale site model but much of that detail will be difficult for the naked eye to see, and therefore many clients opt not to go too detailed. Of course, a museum or corporate display model may be both small-scale and highly detailed. It depends on the model’s purpose.

Site models may be as simple as geometric blocks representing structures, or include textured, storied buildings with window recesses and balconies . The chosen scale of the model will lend itself to different approaches. Most site models include extensive landscaping because there is a large physical campus, or area to represent. Topography is important as well, for the same reason; smaller scale does not mean sacrificing the varied elevations of most sites.

Check out the pictures of different site models below. They include housing developments, office parks, military bases, corporate headquarters and production facilities. Even an urban skate park!

CNC Router Built in the Model Shop

KiwiMill is very pleased to be using its new CNC router in our model shop. This piece of machinery adds greatly to our in-house capabilities. The bed is 4 x 10 ft, with 15 inches of Z travel, allowing for a wide variety of projects.

But the best part? It was designed and built entirely in our  scale model shop.  Our engineer and model designer, Dean, developed and built this piece of machinery over the winter, with wiring assistance from our owner, Derek.

Check out the pictures:

FL Smidth Industrial Model

Industrial Model

This mobile stacking conveyor is part of a system of conveyors that is used in the mining industry to continuously stack mined material. To demonstrate the immense scale of this machine, FLSmidth commissioned a 1:75th scale industrial model for trade shows and client visits.

Industrial Model

This was our very first project involving a model that was made of 95% 3D printed material. Drawings were created in Inventor for days. The 3D printer grew parts. They were cleaned and sorted. The model was painstakingly pieced together. Brass etched railings were added, as well as a conveyor belt depicting material being moved up it. A pick up truck was added (slightly bigger than matchbox size) for scale.

Industrial Model

Industrial Model

Industrial Model

Industrial Model

Lately, our model makers have chosen to pack our most delicate scale models in a custom-made foam and cardboard enclosure, before placing it in yet another layer of foam that lines the Pelican cases we often use.

packing a scale model

packing a scale model

packing a scale model

packing a scale model

Intricate Build of Manifold Trailer Industrial Model

This industrial model of a Manifold Trailer for Forum Energy Technologies involved extensive use of our 3D printer. The result was stunning detail, accuracy, and with the addition of brass structure, great strength.

KiwiMill model makers were very pleased with this attempt to create a model primarily of 3D printed parts that were then assembled into the finished product.


T

Model Maker’s How-To: Molding and Casting Model Hands

model hand

Model Maker Joe recently shared the process by which he created a total of 300 model hands for a client in the medical field:

We had a customer contact us with the need of a class room training aid to use in a practical exercise, measuring gout build-up on a hand. I was initially tasked the job to produce 100 realistic hands with gout build-up at designated locations, using particular dimensions for the bumps.

First we set out choosing a hand model. Then I brushed on a platinum-cure silicone rubber (hardness: 10A, tear strength 102 ply, 1000% elongation at break to guarantee a stretchy, nearly untearable glove) over the model’s hand in thin (this rubber is very thick and traps bubbles) layers.

After achieving a desirable thickness, I shelled the mold with plaster cloth while still on the model’s hand. I made this exo-shell in two halves (palm and back) so that I could pull the mold out.

creating hand mold

After the plaster cloth was dry it was time to separate the two halves of the shell and release the model’s hand from the silicone glove.

molde maker hand mold

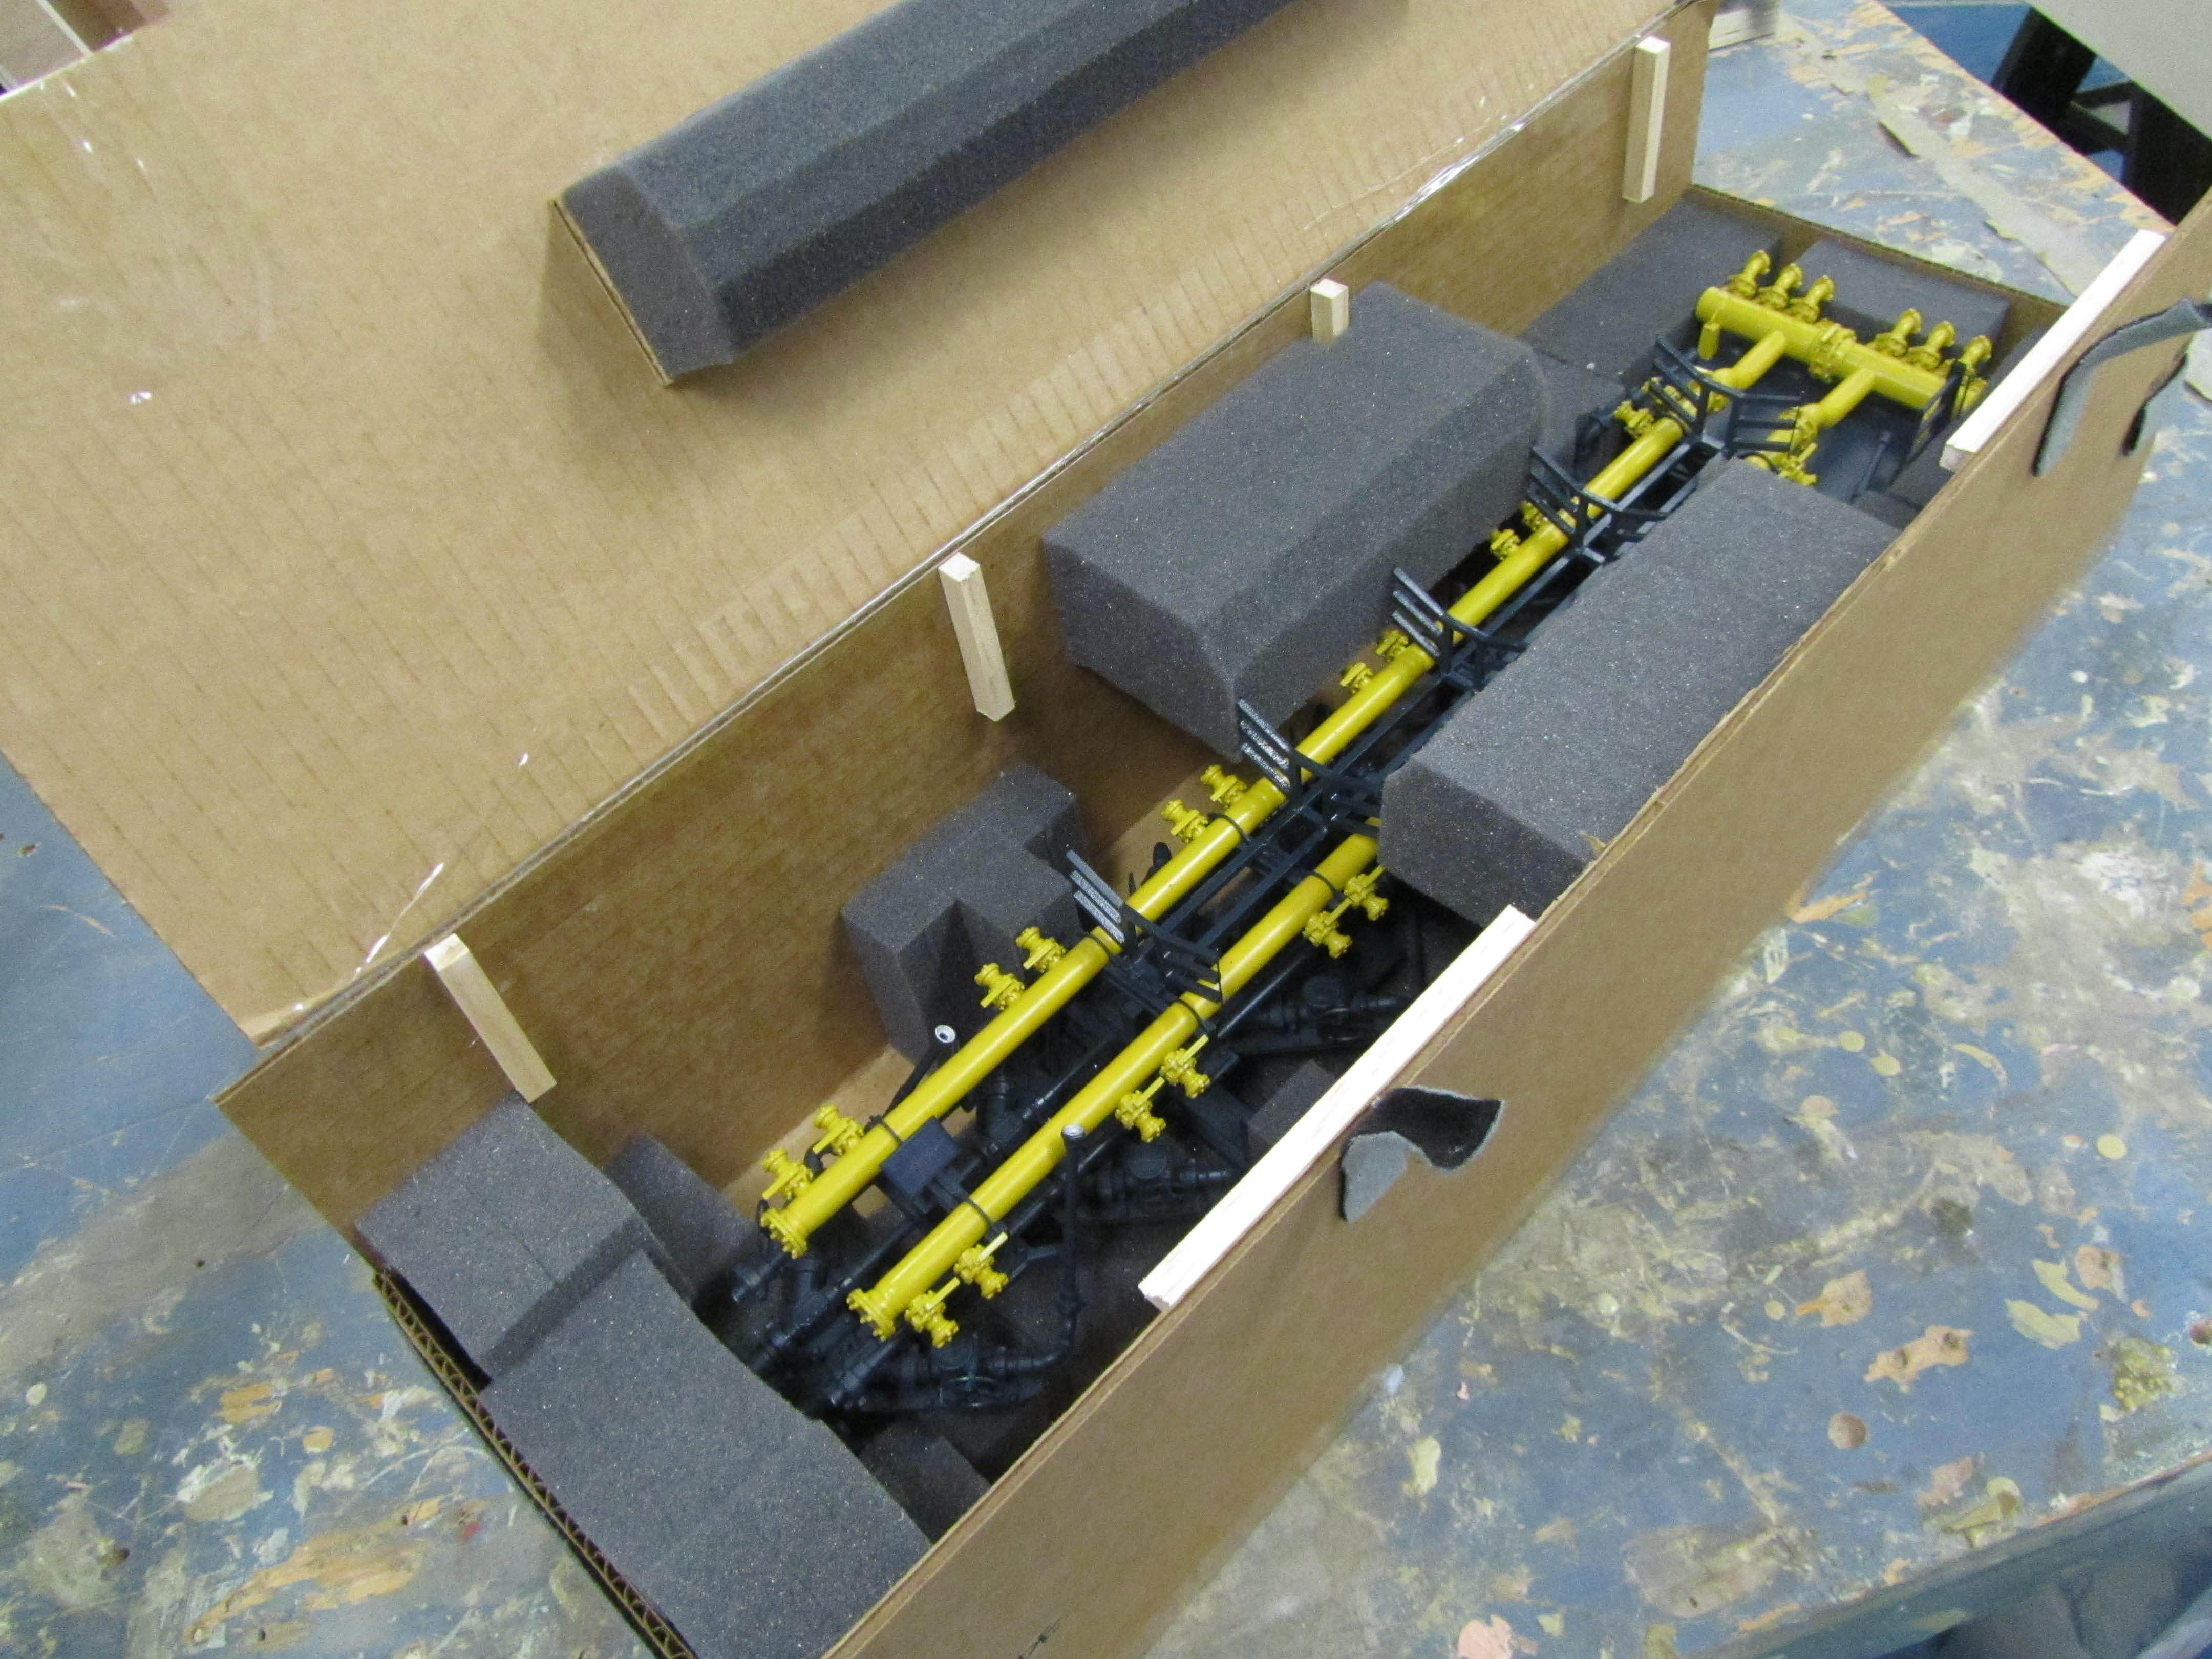
The next thing for me to do was pour a master by putting the glove original in its shell and banding the two halves together. After putting the unit in a standing base (resting on its finger tips, wrist up), I poured a polyurethane casting plastic (hardness: 70D, tear strength 3000 ply, 7.5% elongation at break) with some black tint and put it under pressure.

casting model hand

When the plastic was cured, I peeled the mold back to reveal the master. It revealed many small nodules around the finger tips and palm (most likely do to sweat) that I cleaned off. After the master was cleaned up a bit, another member of the team built up specific (height, width, length) gout swells out of Bondo, per the customer’s request, at particular locations on the hand.

casting model hand

After the art work was done I repeated the same steps above to make three working molds, but this time the polyurethane plastic was tinted with a flesh color.

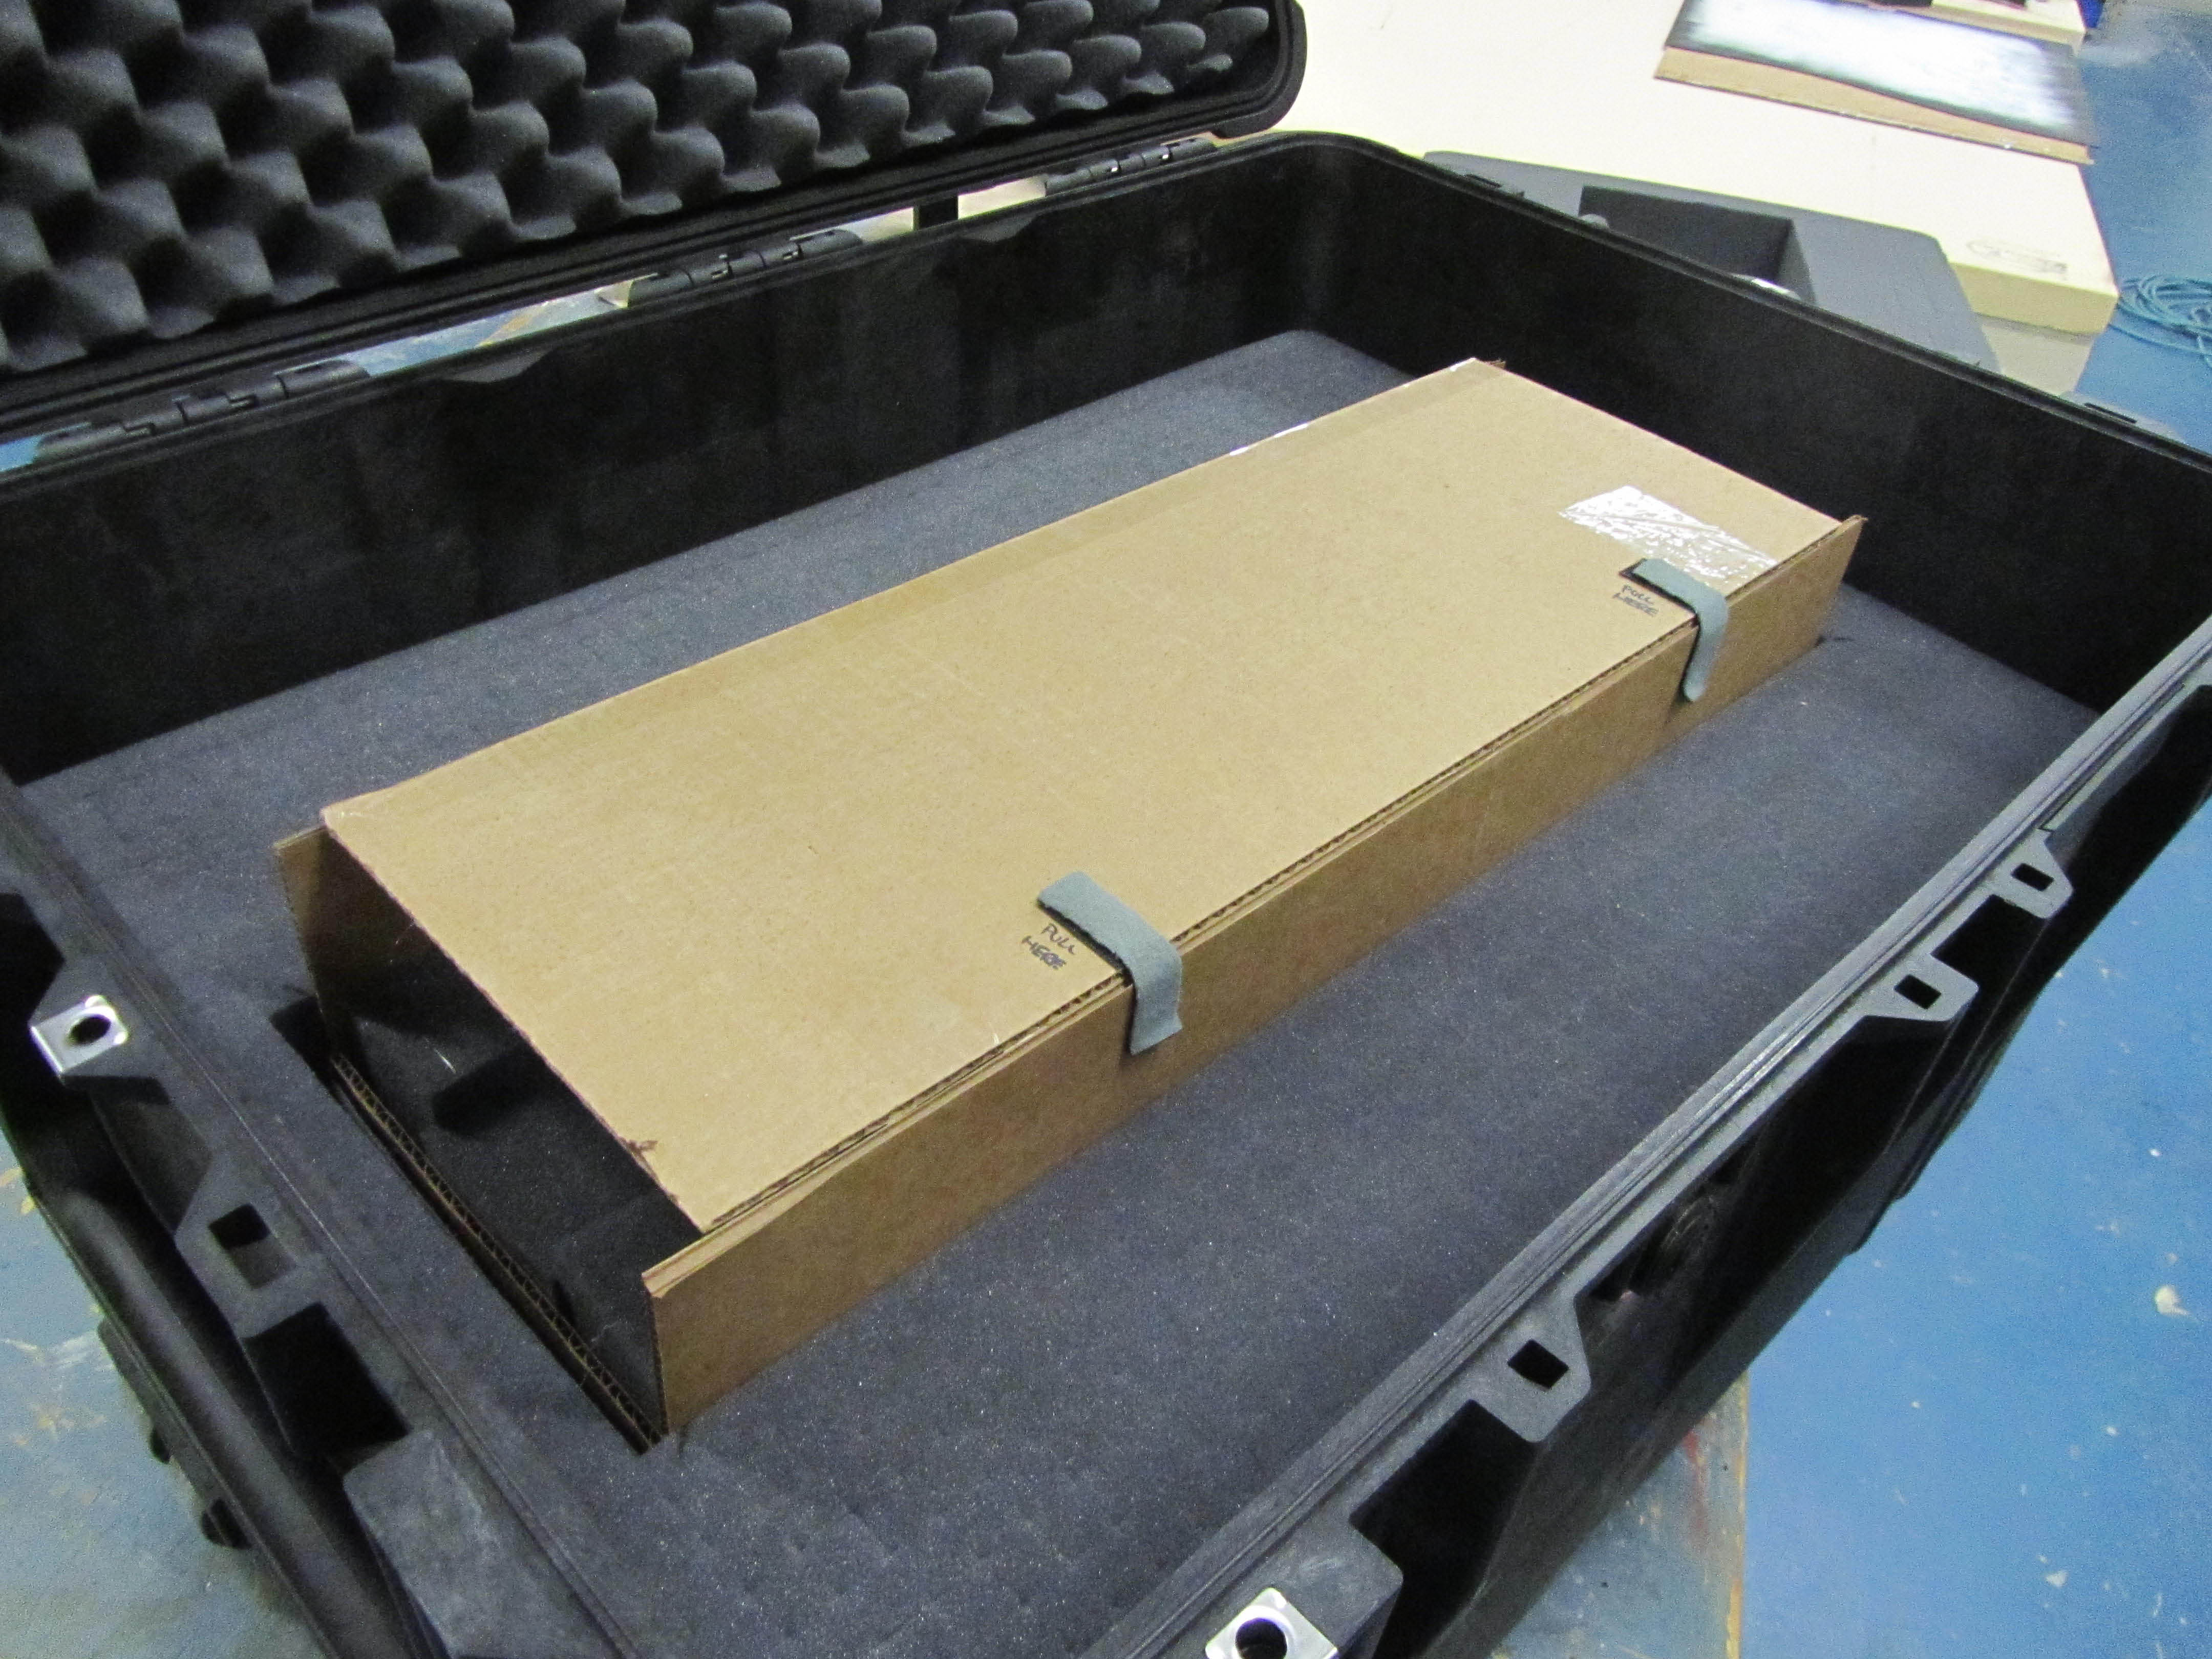
We shipped the client an initial quantity of 20, and upon their review, found the hands too hard and life-like for their studies. We needed to re-tool and come up with a new game plan – a softer plastic or a fast curing rubber.

molde hands

I came up with the idea of a two part silicone mold. A hand cast out of a softer material might not hold up to being pulled out of a glove mold and the cast piece would have to be fully cured (no short cuts).

mold for model hands

Meanwhile another team member was preparing a new master cast by brushing some blackened polyurethane plastic over one of the previous working casts, to even out the skin texture. After that cured, he fine-tuned the gout buildup back to customer specifications and tolerances.

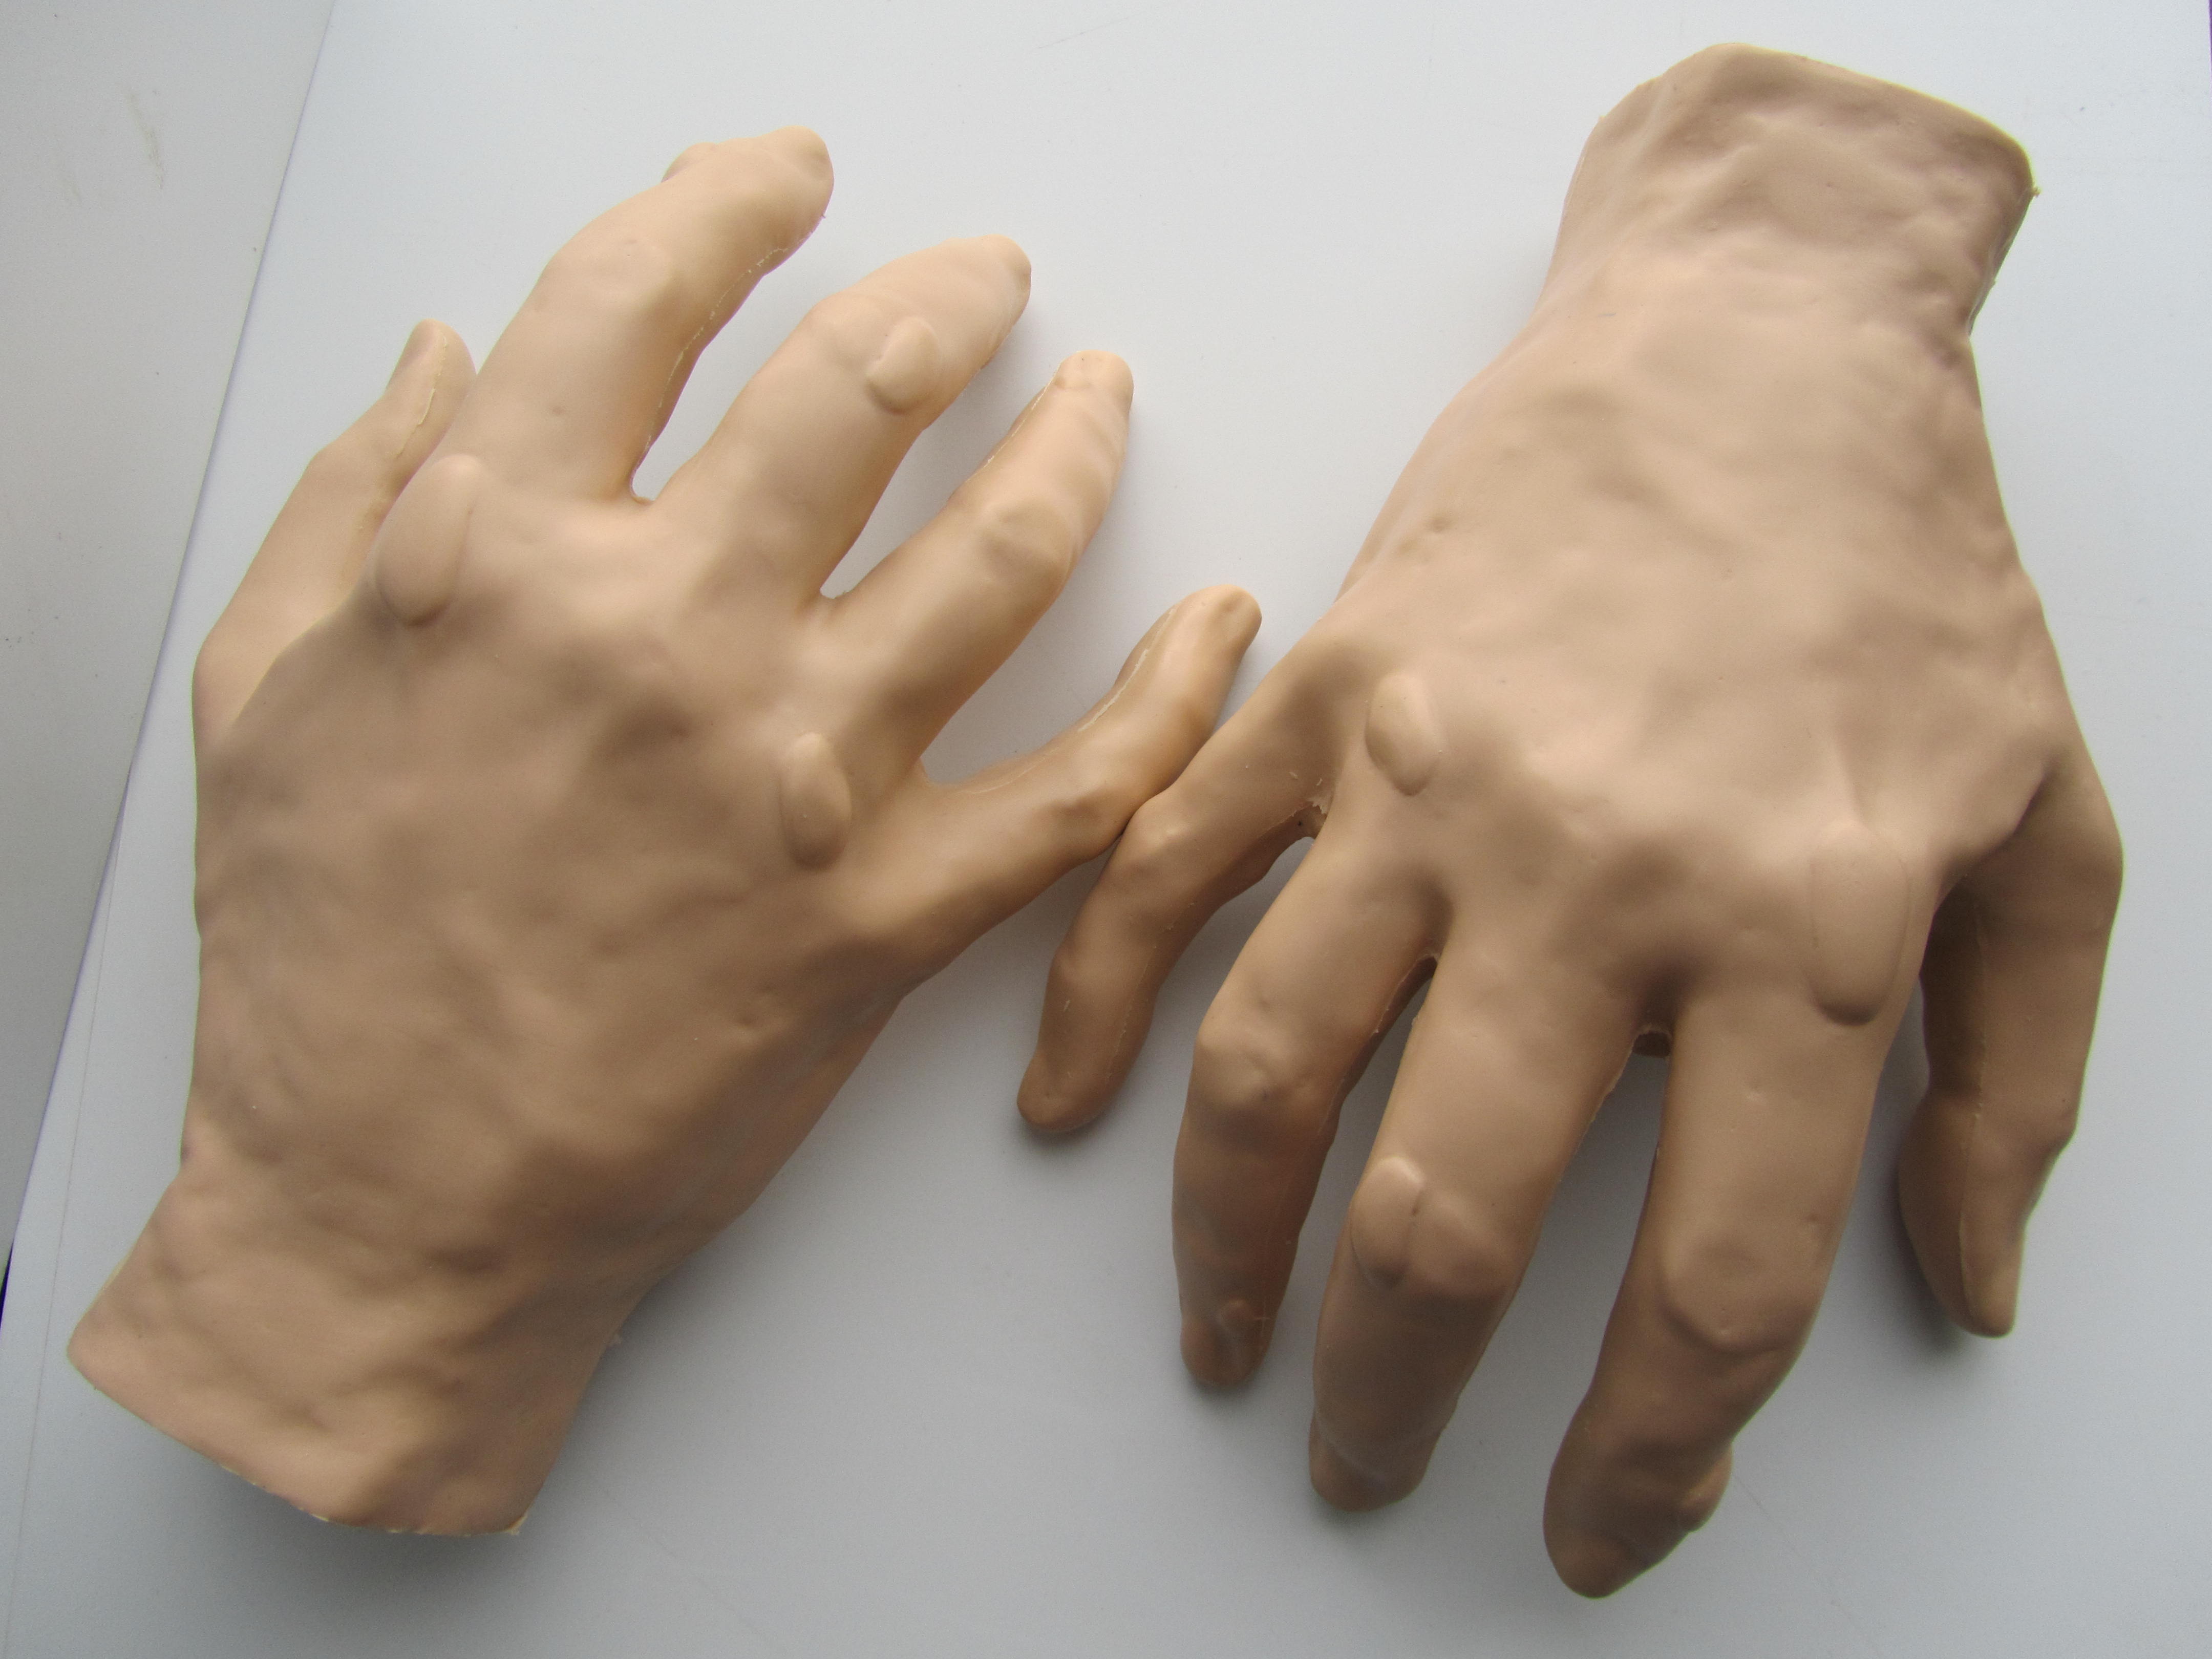
When he was done, I built three two-part molds (fingertips down, wrist up) and begin production casting of my next 80 pieces. This time I used a polyurethane casting plastic (hardness: 80A/30D, tear strength 2264 ply, 233% elongation at break) with the same flesh tint.

pressurized pot for casting

This plastic had a 90 minute demold time, but with the two-part design I was able to turn the mold (pull the product and pour the next piece)  in 60 minutes. These pieces came out of the mold with no flash and very little seam line.

casting hands

The customer was very impressed and the molded hands did what they needed to do. The client ordered 200 more castings.

molded and cast model hands